
Flower Mound Wood Flooring handles water damaged hardwood floor repair in Flower Mound, TX and serving surrounding cities including Lantana, Highland Village, Trophy Club, Southlake and Roanoke, with more than 20 years of wood flooring experience behind the work. These are the jobs where the order of operations matters more than the carpentry, and where acting too fast costs more than waiting.
Almost every water damage call here begins under the slab or behind an appliance rather than on the roof. A pinhole in a copper supply line, a failed icemaker connection, a dishwasher that emptied itself overnight, a water heater at the end of its service life: each of those can put water into a floor for days before a homeowner notices anything beyond a slightly warm spot or a board that looks a shade darker than its neighbors.
By the time the damage is visible, the wood has already absorbed what it is going to absorb, and the useful question is no longer how to make the floor look right today. It is how much of this floor can be saved once it dries, what has to come out regardless, and what record you will need if a claim is involved. We work in that order, and we write the readings down as we go.
What Water Does to a Wood Floor
Cupping and the Moisture Gradient
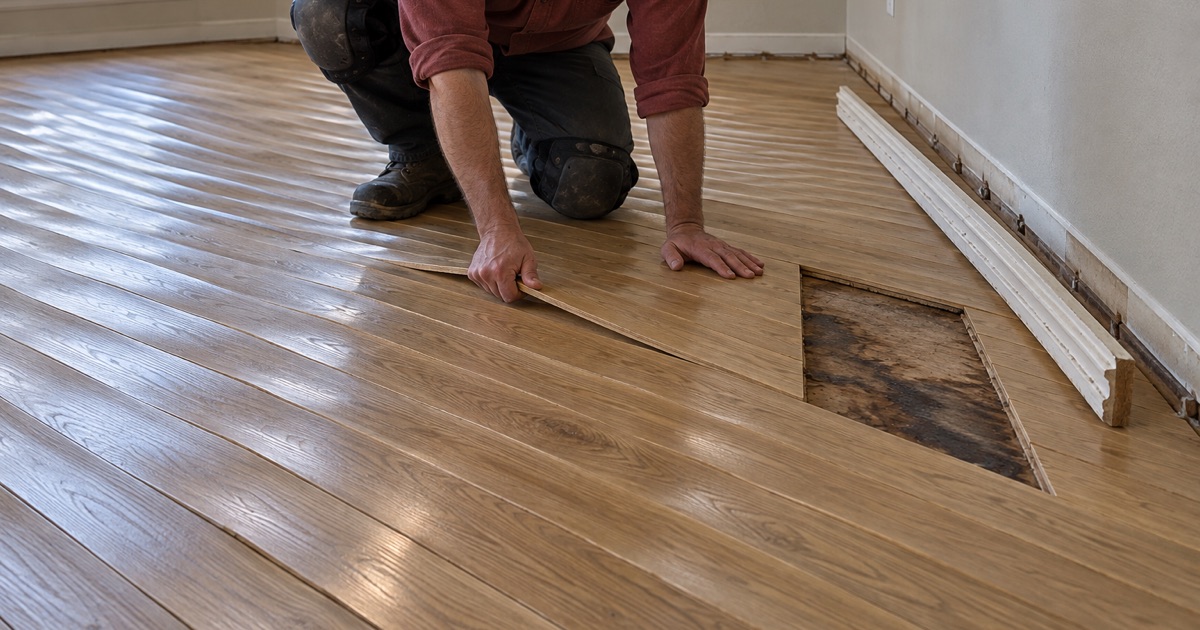
Water almost always reaches a floor from below or from the edges, so the underside of the boards absorbs more than the finished face. The wet side swells, the dry side does not, and the board curls up at its edges. That is cupping, and it is a symptom of a gradient rather than of permanent damage. Once the gradient closes during drying, many boards come back close to flat.
Buckling and Loss of Bond
When a floor absorbs enough water to expand harder than the expansion gap can absorb, it lifts. On a nail-down floor that shows as boards rising in a ridge; on a glue-down floor the adhesive bond releases and whole sections go hollow or loose. Buckled areas rarely recover, but the boundary of the affected area is always wider than the visible lift, and we map it before scoping.
Staining, Tannin and Subfloor Damage
Standing water pulls tannin out of oak and reacts with metal fasteners, which is what produces the black streaks and dark rings that no amount of sanding removes. Below the boards, plywood sheathing that stays wet delaminates and loses its stiffness permanently. Both are decided by inspection once the floor is opened, not from the surface.
Drying Before Deciding
Reading Moisture Rather Than Appearance
We take pinless moisture meter readings in a grid across the affected area and in an untouched part of the same floor for comparison, then repeat them on a schedule. A floor is dry when the two sets of numbers converge and stay converged, not when the surface looks normal. Every reading goes into the record with its date and location.
Reaching the Slab or the Subfloor
Sometimes the water is under the floor and the only way to dry it is to get to it, which can mean lifting a section of boards or removing a length of the field to open the substrate. Concrete releases moisture slowly, so a slab under a wet floor is tested with an in-situ relative humidity probe rather than judged by touch.
Why Sanding Too Early Costs You the Floor
Sanding a cupped floor flat while the gradient still exists is the single most expensive mistake made on these jobs. As the underside finally dries and shrinks, the boards you just made flat become crowned, high in the middle, and the only remedy is another sanding the floor may not have the thickness for. We refuse to sand until the readings say the floor is ready.
Repairing and Rebuilding
Board Replacement and Subfloor Repair
Boards that stay wet, blacken, delaminate, split or sit over failed sheathing are cut out and replaced, and the substrate beneath them is inspected before anything closes. Damaged plywood is cut back to sound material bearing on framing and replaced at matching thickness so the finished height carries through without a step at the seam.
Lacing Into the Undamaged Field
Replacement boards are laced into the surviving floor with staggered joints rather than dropped in as a block, so no straight boundary marks the repair. Where the water reached a doorway, we extend the work out to that natural stopping point, because a sanded field has to end somewhere the eye accepts.
Refinishing the Affected Rooms
New wood and twenty-year-old wood never match until they are finished together, so the repair area is sanded through a full grit sequence with the surrounding floor, stained if the existing floor is stained, and coated to the same sheen level. That footprint gets defined in the written scope before work begins so nobody is surprised by which rooms are involved.
Documentation a Claim Can Actually Use
Dated Photographs From the First Visit
We photograph the affected area at first inspection, again as the floor is opened, and again through drying and reconstruction, with dates attached. Adjusters see finished repairs and prior photographs constantly; what they rarely get is a continuous visual record showing the condition at each stage, and that record is far harder to argue with.
Recorded Moisture Readings
Every reading we take is logged with its date and where on the floor it came from, including the control readings outside the affected area. That log demonstrates both the extent of the damage and the reason for the drying time, which is often the part of a claim that gets questioned when a job runs across several weeks.
An Itemized Scope
The scope separates what must be removed from what can be dried and kept, and prices them as distinct lines rather than as one lump. It also names any work that belongs to another trade, whether that is the plumbing repair, remediation, or foundation work. We are not adjusters and we do not negotiate coverage, but a clear itemization makes the conversation much shorter.
Our Step-by-Step Water Damage Repair Process
Step 1: Source, Extent and First Readings
We confirm the water source is stopped, map the boundary of the affected area including what is not yet visible, take the first set of moisture readings inside and outside the damage, and photograph everything with the date. If the source is not resolved, the flooring work does not start.
Step 2: Opening, Drying and Monitoring
Where access to the substrate is needed, we lift a section of floor rather than guessing, and drying proceeds with readings taken on a schedule until the numbers hold steady against the control area. This is the stage that cannot be compressed, and it is the one we report on as it goes.
Step 3: Scope, Replacement and Subfloor Work
With dry readings in hand we finalize the itemized scope, cut out what cannot be saved, repair or replace the subfloor beneath it, and lace in matched replacement boards. Any referrals to remediation or another trade are settled before the floor closes.
Step 4: Refinishing, Final Readings and Handover
The repaired footprint is sanded, stained where needed and coated to match the surrounding floor, with containment up throughout. A final set of moisture readings and photographs closes the record, and you receive the complete file along with the cure schedule for the finish.
- 20+ Years on Wood Floors
- Dustless Sanding and Containment
- Written Scope Before Work Starts