
Flower Mound Wood Flooring does subfloor repair and floor leveling across Flower Mound, TX and serving surrounding cities including Lantana, Highland Village, Trophy Club, Southlake and Roanoke, with more than 20 years of wood flooring work behind it. This is the least visible part of a flooring job and the part that decides whether the finished floor performs or disappoints.
Most homeowners meet this work as a line item on a quote they were not expecting. The floor felt fine under carpet, the new wood is already ordered, and now there is a paragraph about grinding and underlayment. The reason is that carpet padding compresses over an uneven substrate and hides it completely, while a wood floor is a rigid assembly that reports every hump and dip in the concrete underneath, as hollow spots, clicking joints, telegraphed ridges or a bond that fails early.
The other way people arrive here is after something has gone wrong: a supply line under the slab, an appliance that emptied itself into the floor, or a foundation contractor who has just finished lifting the house. In every one of those cases the substrate has to be measured, dried and corrected before flooring is a sensible conversation, and we sequence the work that way rather than laying a floor over ground that is still moving.
What Actually Makes a Floor Uneven
Slab Flatness Versus Slab Level
These two get used interchangeably and mean different things. Level is measured against gravity across the whole room; flatness is measured against a straightedge over a short span. Flooring manufacturers write their tolerances for flatness, because a room that slopes gently is fine to install over while a slab with a dip halfway across it is not. We measure and report both figures.
Plywood Subfloor Failure
Over a wood subfloor the problems are different: sheathing that has been wet and delaminated, panels that have loosened from the joists, deflection between joists that are spanning further than the panel thickness supports, or a previous repair patched in at the wrong thickness. Each one reads as softness or movement underfoot, and each needs a different correction rather than a layer poured over the top.
Movement After a Leak or Foundation Work
A slab that has taken water or been lifted by a foundation contractor is not the slab that was measured before. Concrete that has been wet holds moisture for a long time after the surface looks dry, and a re-seated slab sits in a new plane. Both need fresh measurements, and in the case of moisture, testing rather than a visual assessment.
Leveling a Concrete Slab
Measuring the Slab Properly
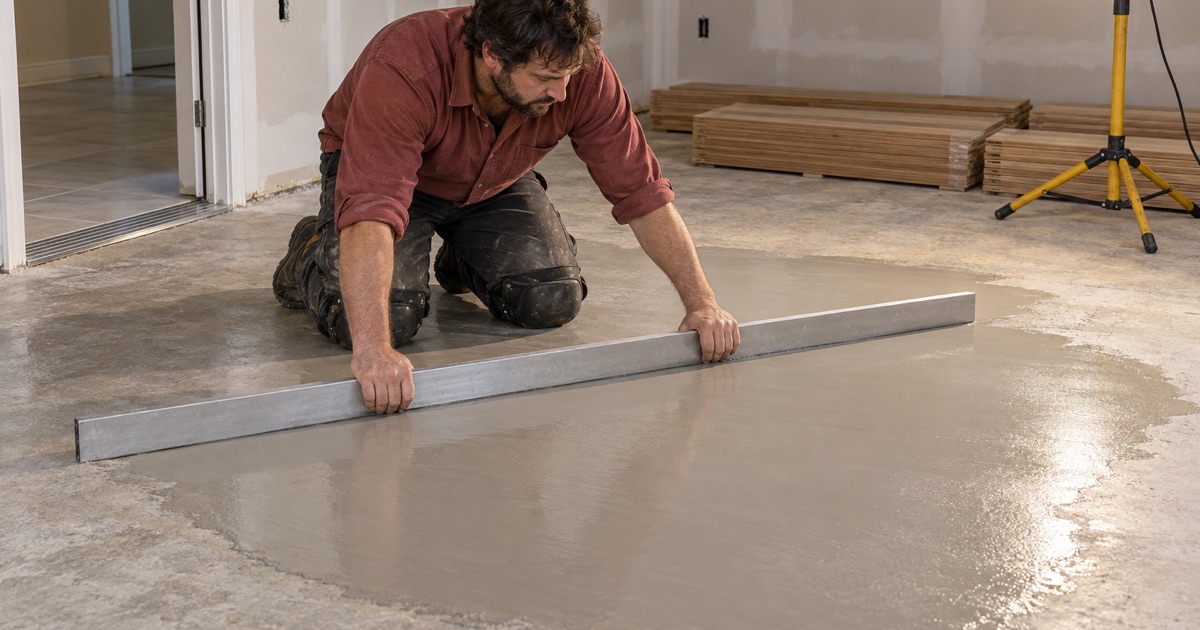
We map the slab rather than spot-checking it, working with a long straightedge and marking the high and low areas across the whole footprint so the correction is planned instead of improvised. That map is what determines how much grinding, how much underlayment and how much material the job actually needs, and it is what keeps the quote from moving once work has started.
Concrete Grinding
High spots come down mechanically with a grinder, which is also how old adhesive, cutback residue, paint and curing compounds are removed so that a new adhesive or underlayment bonds to sound concrete. Grinding is dusty work, so it runs under containment with vacuum extraction, and it usually happens before any pour so that the leveling material is only filling genuine lows.
Self-Leveling Underlayment
Low areas are filled with a cementitious self-leveling underlayment poured over a primed slab, which flows out to a flat plane and cures hard enough to receive flooring. It is not a substitute for grinding, and it is not a way to bridge a structural problem. Pour depth, primer and cure time all follow the product’s own instructions, and the flooring waits until the material has dried to spec.
Repairing a Wood Subfloor
Water-Damaged Sheathing
When a subfloor panel has been wet long enough to delaminate, it has lost the layer bond that gives it stiffness, and drying it does not bring that back. We open the area, trace the damage out to sound material rather than stopping at the visible stain, and replace whole panel sections cut to bear on framing so the repair has proper support at its edges.
Deflection, Loose Panels and Squeaks
A subfloor that flexes underfoot is either fastened poorly or spanning too far for its thickness. Re-fastening into the joists solves the first. The second needs added support or a thicker panel, not another layer of screws. We check the framing below where there is access, because a squeak directly above a joist and a squeak between joists are two different repairs.
Height Matching and Transitions
A subfloor repair has to come back to the same finished height as the surrounding floor, or the new wood telegraphs the step. That means matching panel thickness exactly, feathering any difference across a wide area rather than at the seam, and checking the result under a straightedge before flooring is installed. Where a height change is unavoidable, we design the transition instead of improvising one.
Sequencing Around the Other Trades
After the Plumber, Not Beside Them
A slab leak repair means the concrete has been opened, patched and left with a wet area around the excavation. We wait for the patch to cure and the surrounding slab to dry to a tested moisture level, because a floor installed over a fresh patch will show it. Moisture readings, not the calendar, decide when that wait is over.
After Foundation Repair
Foundation work changes the elevation of the slab and puts stress into everything sitting on it. Grinding or pouring before the piers are set and the slab has settled means measuring against a plane that is about to move. We coordinate directly with the foundation contractor and take our measurements after their work is complete and the house has had time to settle.
Before the First Board Goes Down
The last measurement is the one that counts. Once grinding and pouring are finished and the underlayment has cured, we re-check the whole area against the flooring manufacturer’s stated tolerance and against a moisture test, and only then release the floor for installation. If it does not pass, it gets corrected, because nothing about this improves after the wood is down.
Our Step-by-Step Subfloor and Leveling Process
Step 1: Assessment and Mapping
We measure the substrate across its full footprint, mark the highs and lows, sound for hollow or delaminated areas, take moisture readings and check heights at every doorway and appliance opening. That map, plus the tolerance published for the flooring product you have chosen, defines the scope.
Step 2: Written Scope and Sequencing Plan
You get the readings, the correction plan and the price in writing, along with where this work sits relative to any plumbing, foundation or cabinetry work. Where another trade has to finish first, that dependency is named in the schedule instead of being discovered on the morning we arrive.
Step 3: Grinding, Removal and Repairs
High spots and residues come off under containment, damaged sheathing is cut out and replaced, loose panels are re-fastened and framing problems are identified and addressed or referred. This is the noisy, dusty stage, and it runs with the rest of the house sealed off and the space cleaned at the end of each day.
Step 4: Pouring, Curing and Final Verification
Primer and self-leveling underlayment go down to the planned depth and are left to cure and dry to specification. Then we re-measure flatness against the straightedge, re-test moisture, confirm the heights at transitions, and hand over a substrate that has been verified rather than assumed ready.
- 20+ Years on Wood Floors
- Dustless Sanding and Containment
- Written Scope Before Work Starts