
Flower Mound Wood Flooring installs engineered hardwood flooring across Flower Mound, TX and serving surrounding cities including Lantana, Highland Village, Trophy Club, Southlake and Roanoke, with more than 20 years of wood flooring work behind it. Nearly every house in this area is built on a concrete slab, and that single fact is why engineered hardwood is the product we install most often here.
Engineered hardwood gets described as the budget version of a real wood floor, which is a misunderstanding worth clearing up early. The surface is real wood of a named species. What differs is what sits underneath it: a cross-laid core that holds the plank dimensionally stable when the slab beneath it or the air above it changes moisture. That stability is a performance feature, not a compromise, and on slab-on-grade housing it is the reason the floor stays flat.
What separates a good engineered installation from a disappointing one is almost never the product. It is the concrete: whether the slab was tested, whether it was ground and leveled to the manufacturer’s flatness tolerance, and whether the right vapor retarder went down. We test before the install date is committed to the calendar, and everything we recommend after that follows from the reading.
Installing Engineered Hardwood Over a Concrete Slab
Glue-Down Installation
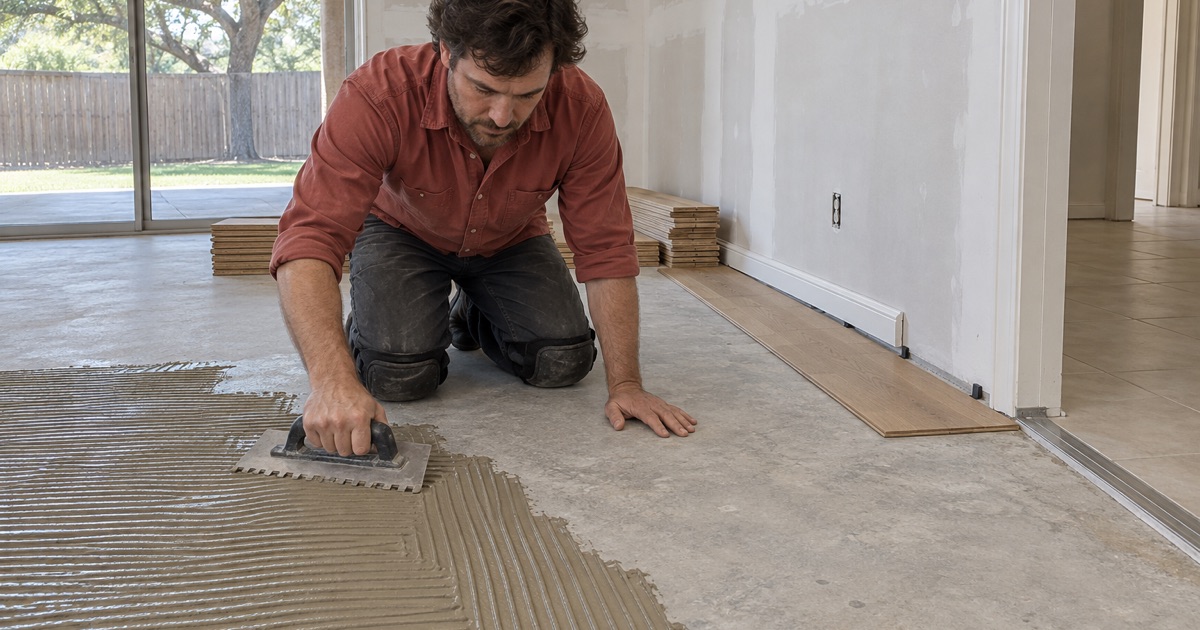
Glue-down bonds each plank directly to the prepared slab with a trowel-applied adhesive, many of which carry their own moisture-control properties. It produces the most solid feel underfoot, the least hollow sound and the least movement at transitions, which is why it is our usual method in main living areas. It also demands the flattest substrate, because an adhesive bed cannot bridge a dip in the concrete.
Floating Installation
A floating floor locks plank to plank over an underlayment and is not fastened to the slab at all, so the whole field expands and contracts as one unit. It goes down faster, tolerates slightly more slab variation and can be lifted again, but it sounds different underfoot and needs a properly sized expansion gap at every wall and obstruction. Some products are engineered for it specifically.
Moisture Testing and Vapor Retarders
Before either method, we run an ASTM F2170 in-situ relative humidity test, which reads the concrete’s internal moisture through probes set into the slab rather than sampling the surface, and confirm the wood side with a pinless moisture meter. A calcium chloride test measures vapor emission off the surface where a product calls for it. The reading determines which vapor retarder or moisture-control adhesive the floor gets.
Reading an Engineered Hardwood Specification
Wear Layer Thickness
Wear layer thickness is the single number that separates a floor you maintain from a floor you eventually replace, because it sets how much wood is available to sand. A thick sawn layer buys future refinishes. A thin sliced veneer buys a screen and recoat, if that. We put the figure in your written scope so the decision is made deliberately at purchase rather than discovered later.
Core Construction
Underneath the wear layer sits either a plywood core of cross-laid plies or a composite core, and the two behave differently over a slab and at fasteners. Ply count, the direction of each layer and the quality of the bond between them are what actually deliver dimensional stability. We look at the construction rather than the brand, because a thick wear layer on a poor core still telegraphs whatever the slab does.
Finish and Formaldehyde Compliance
Most engineered hardwood arrives prefinished with a factory-cured coating that is harder than anything applied on site, and it comes in the same range of sheen levels as a site-finished floor. Composite wood products sold in the United States are covered by the TSCA Title VI formaldehyde standard, so the compliance documentation exists for any legitimate product. We work from the manufacturer’s own installation instructions, because deviating from them is what voids a warranty.
Choosing the Look
White Oak, Red Oak and Hickory Veneers
Species reads the same in engineered as in solid, because the visible surface is the same wood. White oak is the current default for light and gray-toned floors, since it has no pink undertone to fight. Red oak brings warmth and a more open grain. Hickory swings dramatically in color between boards, which some homeowners love and others find busy across a large open plan.
Plank Width and Length
Engineered construction is what makes genuinely wide planks practical, since a wide solid board moves a great deal across its width with seasonal humidity. Wider boards put fewer seams in a room and read calmer and more current. Longer boards reduce end joints. Both change the layout plan, and we set out the field before the first plank so joints do not stack up into a visible pattern.
Wire-Brushed, Hand-Scraped and Smooth
Wire-brushing removes the soft early wood and leaves the hard grain proud, which hides daily wear extremely well and is the most popular texture we install. Hand-scraped surfaces read rustic and sculpted. Smooth is crisp and modern and shows every scratch. In a household with dogs or a busy back entry, texture is a more useful decision than sheen.
Where Engineered Wins, and Where Solid Still Does
Slab-on-Grade and Below-Grade Rooms
Over a concrete slab, engineered hardwood is not a second choice; it is the correct one. It bonds or floats over concrete without a wood subfloor to nail into, and it tolerates the moisture gradient a slab always has. Solid hardwood in the same position needs a fastening substrate built over the slab, which raises the floor height and adds a great deal of cost.
Rooms With Moisture and Temperature Swings
A sunroom, a room over an unconditioned space or a house that swings between a dry heated winter and a humid summer all put a floor through cycles that widen seasonal gapping in solid wood. The cross-laid core resists that movement. It does not make wood waterproof, and a standing leak still damages an engineered floor, but ordinary seasonal change troubles it far less.
The Refinishing Tradeoff
Where there is a sound wood subfloor and you want a floor your grandchildren can sand, solid hardwood still wins on sheer available thickness. That is the honest tradeoff, and it is the one worth weighing rather than any argument about which is real wood. We lay both options out with the substrate, the moisture reading and the wear layer figure side by side, then let you decide.
Our Step-by-Step Engineered Hardwood Flooring Process
Step 1: Slab Assessment and Moisture Testing
We measure the slab for flatness, check for existing coatings or adhesive residue, and set relative humidity probes into the concrete. Nothing is ordered and no date is booked until the readings are back, because a failed slab discovered after delivery means stored material and a moved schedule.
Step 2: Grinding, Leveling and Substrate Prep
High spots come down with concrete grinding and low spots come up with self-leveling underlayment until the slab meets the product’s flatness tolerance. Old adhesive and cutback are removed rather than covered. This step is invisible in the finished floor and it is the one most responsible for how the floor performs.
Step 3: Delivery, Acclimation and Layout
Material is delivered into the rooms it will occupy and left to reach equilibrium at the conditions the house actually runs, not in a garage or a truck. While it acclimates we set out the layout: board direction against the longest sightline, the starting line, the stagger pattern and where every transition will land.
Step 4: Installation, Transitions and Finish Details
The field goes down glue-down or floating as specified, with expansion gaps held at every wall, cabinet toe kick and column. Then come the details that make it look finished: T-molding, reducers and thresholds at every change of surface, quarter round or reinstalled baseboard, and a full clean before we hand the rooms back.
- 20+ Years on Wood Floors
- Dustless Sanding and Containment
- Written Scope Before Work Starts